Creating personalized tea labels is easy with free printable templates. You'll find numerous designs online that you can customize to match your tea blends or gifting needs. Start by downloading a template that suits your style, then use editing software to add your own text and graphics. Choose appropriate paper for printing, ensuring it's durable and water-resistant. Cut your labels carefully and apply them to your tea bags or containers. Don't forget to create matching boxes for a cohesive look. With these custom labels, you'll elevate your tea experience and impress recipients with professional-looking packaging. Discover how to make your tea collection truly unique and eye-catching.
Benefits of Custom Tea Labels
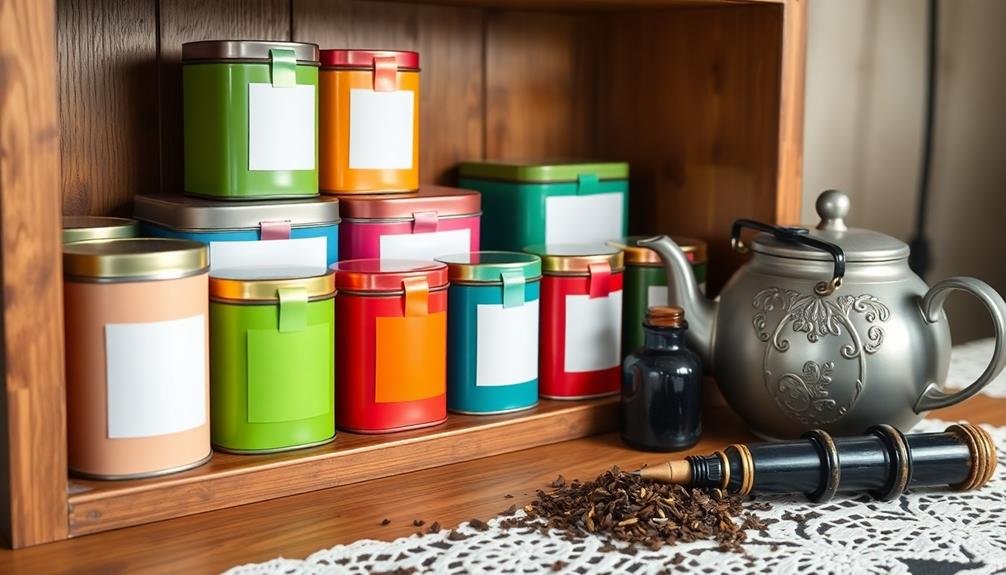
Personalization breathes new life into the tea-drinking experience. Custom tea labels offer a unique way to elevate your tea collection and make your blends stand out.
They're perfect for organizing your tea cabinet, guaranteeing you can quickly find your favorite flavors. You'll never mix up your teas again, saving time and frustration during your daily brew routine.
Custom labels also make excellent gifts for tea lovers. You can create personalized blends with thoughtful names and designs that resonate with the recipient. This attention to detail shows you've put extra care into your present, making it more meaningful and memorable.
For tea enthusiasts who blend their own mixes, custom labels provide a professional touch. You can showcase your creativity and brand your homemade teas, whether for personal use or small-scale selling.
They're also great for special occasions like weddings or parties, where themed tea labels can add a charming detail to the event.
Moreover, custom labels allow you to include important information like ingredients, steeping instructions, and expiration dates. This guarantees you're always brewing the perfect cup and maintaining the quality of your teas.
Choosing the Right Template Design
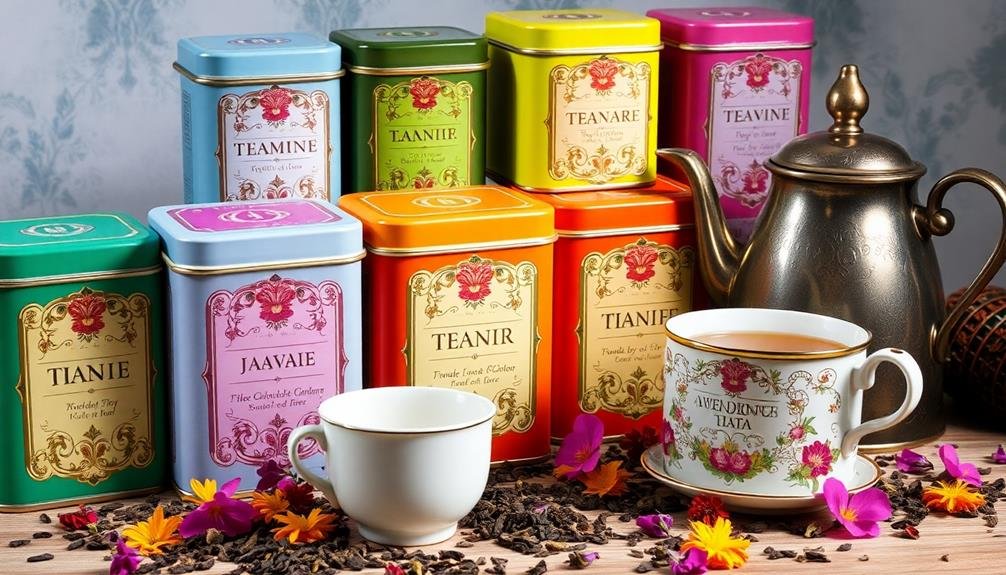
When it comes to choosing the right template design for your personalized tea labels, you'll want to contemplate several factors. First, consider the style that best reflects your brand or the occasion. Elegant script fonts might suit a sophisticated tea blend, while playful designs could work for fruit-infused teas.
Think about the color scheme too – earthy tones for herbal teas or bright colors for energizing blends.
Next, evaluate the template's layout. Confirm there's enough space for essential information like the tea name, ingredients, and brewing instructions. Some templates offer more room for creative elements, while others prioritize text clarity.
Don't forget to check if the template is compatible with your printer and label paper.
Consider the shape and size of your tea packaging. Round labels work well for tins, while rectangular ones suit boxes or bags. If you're using clear containers, opt for designs that allow the tea leaves to show through.
Lastly, look for customizable elements. The best templates let you easily swap out colors, fonts, and graphics to create a truly unique label that stands out on the shelf or as a gift.
Essential Materials and Tools
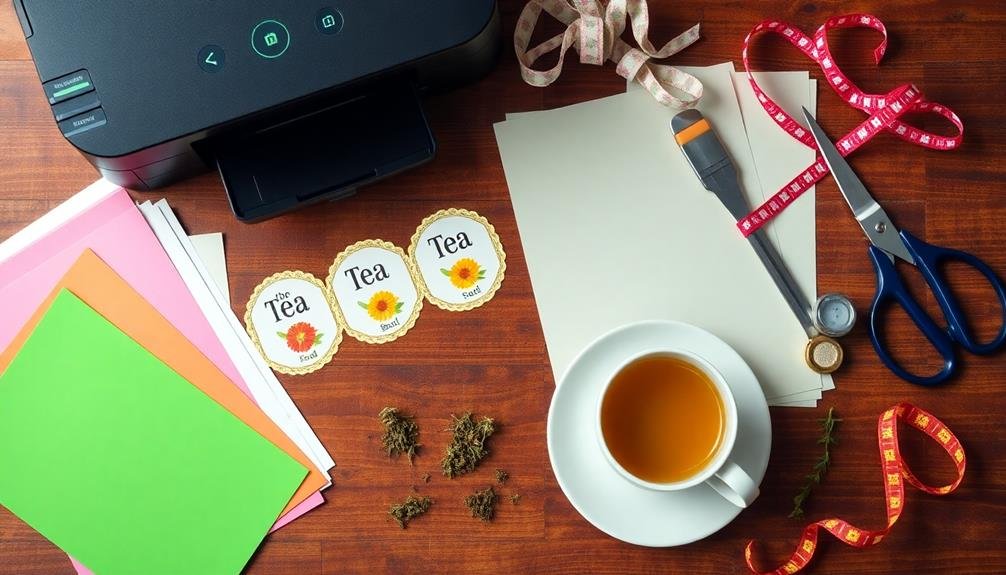
Before you start creating your personalized tea labels, you'll need to gather the essential materials and tools.
Your supplies list should include items like adhesive paper, scissors, a printer, and various craft supplies depending on your chosen design.
You'll also want to make sure you have the necessary equipment, such as a computer for designing, a cutting mat if using a craft knife, and potentially a laminator for added durability.
Necessary Supplies List
To create personalized tea labels, you'll need a few essential supplies and tools. Begin with high-quality cardstock or label paper, which will provide a sturdy base for your designs.
You'll also require a reliable printer with color ink to bring your labels to life. Scissors or a paper cutter are vital for precise trimming of your labels.
For adhering the labels, gather double-sided tape, glue dots, or a glue stick. If you're using jars or tins, consider clear packaging tape for a waterproof seal.
Don't forget a set of fine-tipped markers or pens for adding personal touches or handwritten elements.
To enhance your labels, stock up on decorative items like washi tape, stickers, or rubber stamps. A hole punch and twine or ribbon are perfect for creating hang tags.
If you plan to laminate your labels for durability, invest in a small laminator and laminating pouches.
Lastly, make sure you have a computer with design software or access to online design tools for creating your label templates.
With these supplies at hand, you'll be well-equipped to craft beautiful, personalized tea labels.
Required Equipment Overview
The heart of personalized tea label creation lies in having the right equipment at your fingertips. To bring your custom tea labels to life, you'll need a reliable computer with internet access and a compatible printer. Confirm your printer can handle the specific paper type you've chosen for your labels.
A pair of scissors or a paper cutter is essential for achieving clean, precise edges on your labels. If you're using adhesive-backed paper, you mightn't need additional adhesive. However, if you're working with regular paper, have a glue stick or double-sided tape on hand.
Consider investing in a laminator if you want to protect your labels from moisture and wear. This is particularly useful for tea bags that might come into contact with water. If you're creating cylindrical labels for tea tins, a ruler will help you measure and cut accurately.
Don't forget about design software. While many free templates are available online, having access to basic image editing software can allow for more customization.
Downloading Free Printable Templates
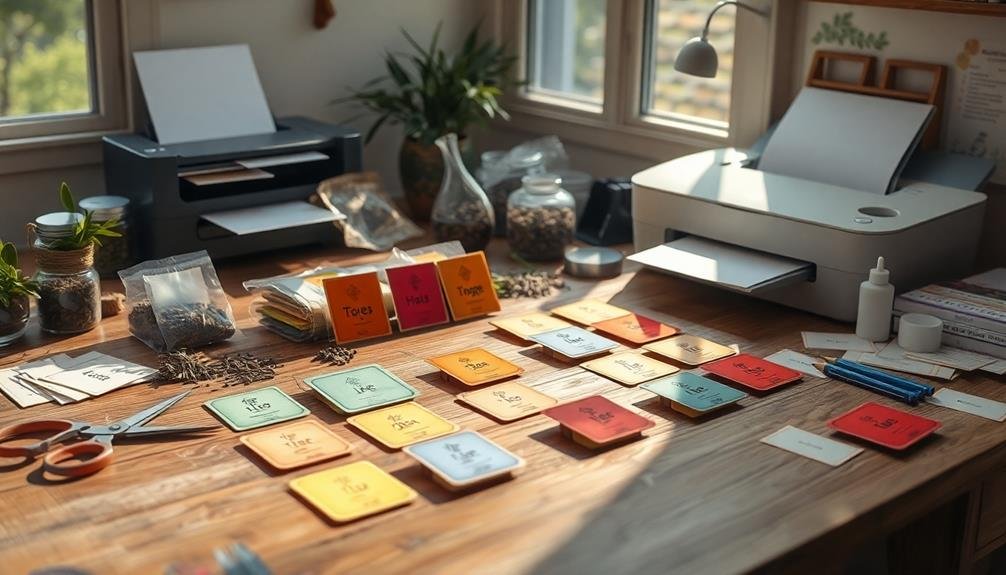
Numerous free printable templates for personalized tea labels are available online, making it easy to start your DIY project. To find these templates, search for "free printable tea labels" or "custom tea label templates" using your preferred search engine. You'll discover a variety of websites offering downloadable designs.
When you've found a template you like, click the download button or link provided. Most templates come in PDF or image formats like JPG or PNG. Save the file to your computer in a location you'll easily remember.
Before downloading, check if the template requires any specific software for editing, such as Adobe Acrobat or Microsoft Word. Some websites may ask you to sign up for a free account or provide your email address before allowing downloads. If you're concerned about privacy, look for sites that offer direct downloads without registration.
Always scan downloaded files with antivirus software to verify they're safe. Once you've downloaded your chosen template, open it to confirm it meets your needs. If you plan to edit the template, verify you have the necessary software installed on your computer before proceeding to the customization stage.
Customizing Label Text and Graphics

With your downloaded template ready, it's time to personalize your tea labels.
Begin by opening the template in your preferred editing software, such as Adobe Photoshop, Canva, or Microsoft Word. Select the text areas and replace the placeholder content with your own. Choose fonts that reflect your style or match your tea's theme. For a classic look, opt for serif fonts; for a modern feel, try sans-serif options.
Next, customize the graphics. If the template includes images, you can replace them with your own or modify existing ones. Add your tea brand's logo or create a unique icon representing the tea flavor. Use color schemes that complement your tea packaging or evoke the essence of the blend.
Don't forget to include essential information like tea type, ingredients, brewing instructions, and your company name. If space allows, add a brief description of the tea's flavor profile or origin.
Verify all text is legible by maintaining adequate contrast between the font and background colors. Proofread your labels carefully to avoid typos or inaccuracies.
Once you're satisfied with your customizations, save your work and prepare for printing.
Selecting Appropriate Paper Types
Once you've designed your perfect tea labels, choosing the right paper is vital for achieving professional results. Consider using a high-quality, white cardstock with a weight between 80 and 110 lb. This paper type offers durability and a crisp appearance for your labels.
For a more eco-friendly option, look for recycled cardstock or kraft paper. These materials provide a rustic, natural look that complements many tea blends.
If you're printing labels for tea bags, opt for water-resistant or waterproof paper to prevent smudging or bleeding when exposed to moisture.
Glossy photo paper can create vibrant, eye-catching labels, but it may not be suitable for all printing methods. Matte photo paper offers a good balance between color vibrancy and practicality.
For a luxurious touch, consider using textured papers like linen or felt-finish cardstock.
When selecting paper, verify it's compatible with your printer. Inkjet printers work well with most paper types, while laser printers may require specific heat-resistant papers.
Always test your chosen paper with a sample print before committing to a large batch of labels.
Printing Your Personalized Tea Labels
Now that you've selected the ideal paper for your tea labels, it's time to bring your designs to life through printing. First, make certain your printer is calibrated and has sufficient ink. If you're using an inkjet printer, opt for pigment-based inks for better water resistance. For laser printers, verify the paper you've chosen is compatible to avoid melting or jamming.
Before printing the entire batch, do a test print on regular paper to check alignment and colors. Adjust your printer settings as needed, paying attention to paper type and print quality options. When you're satisfied with the test print, load your chosen label paper into the printer tray.
Print your labels in small batches to prevent paper jams and guarantee consistent quality. Allow the ink to dry completely before handling the labels. If you're using a cutting machine, feed the printed sheets carefully to avoid misalignment.
For added durability, consider applying a clear, water-resistant sealant spray to protect your labels from moisture. Let them dry thoroughly before attaching them to your tea packaging or containers.
Cutting and Preparing Labels
To create your personalized tea labels, you'll need to gather the right cutting tools, such as scissors, a craft knife, or a paper trimmer.
You should select a paper stock that's sturdy enough to withstand handling but thin enough to adhere well to your tea packaging.
Once you've got your materials ready, focus on precision cutting techniques to guarantee clean, professional-looking edges for your labels.
Gathering Necessary Cutting Tools
Before diving into label preparation, you'll need to round up the right cutting tools for the job. The essential items include a sharp pair of scissors, a craft knife with replaceable blades, and a self-healing cutting mat. Scissors are ideal for cutting straight lines and general shaping, while a craft knife offers precision for intricate designs and corners.
Choose scissors with comfortable handles and sharp blades to guarantee clean cuts. For the craft knife, opt for one with an ergonomic grip and a locking mechanism for safety. The self-healing cutting mat protects your work surface and extends the life of your blades.
Additional tools that can be helpful include a metal ruler for straight cuts and measurements, a corner rounder for softening edges, and a paper trimmer for perfectly straight cuts on multiple labels. If you plan on creating curved labels, consider investing in a circle cutter.
Ascertain all your tools are clean and in good condition before starting. Sharp blades will give you cleaner cuts and more professional-looking results. Keep spare blades on hand to replace dull ones as needed.
Choosing Appropriate Paper Stock
With your cutting tools ready, selecting the right paper stock for your tea labels is the next key step. You'll want to choose a paper that's durable enough to withstand moisture and handling while still being easy to cut and print on.
Consider using a heavyweight cardstock, ideally between 80-110 lb (216-298 gsm). This weight range offers a good balance of sturdiness and printability.
Opt for a matte or slightly textured finish, as glossy papers can be slippery and may not adhere well to tea containers. Look for acid-free, archival-quality paper to guarantee your labels don't yellow or deteriorate over time.
If you're using an inkjet printer, select a paper specifically designed for vibrant color printing.
For an eco-friendly option, consider using recycled cardstock or kraft paper. These materials can add a rustic, natural look to your tea labels.
If you plan to write on the labels by hand, choose a paper with a smooth surface that works well with your preferred writing tools.
Remember to test your chosen paper stock with your printer before committing to a large batch. This will help you avoid any surprises in print quality or color accuracy.
Precision Cutting Techniques
Once you've settled on the perfect paper stock, it's time to plunge into cutting your tea labels with precision.
Begin by ensuring your cutting tools are sharp and clean. A paper trimmer or guillotine cutter is ideal for straight, clean cuts. If you're using scissors, opt for sharp craft scissors with a fine point for intricate designs.
Print your labels on a sheet, leaving ample space between each one. Use a ruler and pencil to lightly mark cutting lines if they're not pre-printed. When cutting, work slowly and steadily, focusing on one label at a time.
For rounded corners, use a corner punch tool or carefully trim with small scissors. If your labels have intricate shapes, consider using a craft knife on a cutting mat. Always cut away from yourself and apply even pressure.
For multiple identical cuts, create a template from cardstock to trace around. After cutting, gently erase any visible pencil marks. Smooth the edges with a nail file if needed.
Stack your cut labels neatly, separating layers with wax paper to prevent sticking. Store them in a dry place until you're ready to apply them to your tea packaging.
Applying Labels to Tea Bags

Applying labels to tea bags requires three key steps for best results.
First, make sure your tea bags are clean and dry. Wipe them gently with a lint-free cloth if necessary. This will help the labels adhere properly and prevent moisture from affecting the ink.
Next, carefully peel the backing off your cut labels. If you're using adhesive paper, this step is essential. For non-adhesive labels, you'll need to apply a thin layer of glue. Use a glue stick or a small brush to apply adhesive evenly, avoiding excess that could seep through the label.
Finally, position the label on the tea bag. Start at one edge and slowly press down, moving across the label to avoid air bubbles. If you're attaching to the string, wrap the label around it and press the edges together. For flat tea bags, center the label on one side.
After applying, gently press the label with a clean, dry cloth to guarantee full adhesion.
Let the labeled tea bags sit undisturbed for at least an hour before packaging or using them. This allows the adhesive to set completely, making sure your personalized labels stay put.
Creating Matching Tea Boxes
After personalizing your tea bags, you'll want to create matching boxes to complete your custom tea set.
Begin by selecting box designs that coordinate with your tea labels, ensuring a cohesive look.
Consider sizing options to accommodate different quantities of tea bags, and add decorative finishing touches like ribbons or custom seals to elevate the overall presentation.
Choosing Coordinating Box Designs
The next step in creating your personalized tea experience is selecting coordinating box designs. Reflect on the overall theme you want to convey and choose patterns that complement your tea labels. Opt for designs that reflect the tea's flavor profile or origin. For example, use floral patterns for herbal teas or geometric shapes for bold black teas.
Pay attention to color schemes that match or contrast with your labels. You can create a cohesive look by using similar hues or add visual interest with complementary colors.
Don't forget to reflect on the box material when selecting designs – some patterns may work better on matte surfaces, while others shine on glossy finishes.
Keep in mind the size and shape of your boxes when choosing designs. Larger boxes can accommodate more intricate patterns, while smaller ones may benefit from simpler, cleaner designs.
You can also experiment with different textures or embossing techniques to add depth to your box designs. Remember to leave space for any necessary product information or branding elements.
Sizing for Different Quantities
Sizing your tea boxes correctly is essential for accommodating different quantities of tea bags or loose leaf tea. Take into account the standard sizes for tea packaging and adjust your box dimensions accordingly.
For single-serving tea bags, a small box measuring 2.5 x 1.5 x 3 inches will suffice. If you're packaging 10-20 tea bags, opt for a medium-sized box around 3 x 2 x 4 inches.
For loose leaf tea, factor in the density and volume of your blend. A 2-ounce tin typically measures 2.5 x 2.5 x 3 inches, while a 4-ounce tin might be 3 x 3 x 4 inches.
When designing your box template, add an extra 0.25 inches on each side for folding and gluing tabs.
Don't forget to take into account the weight of your tea when choosing box materials. Heavier quantities may require sturdier cardstock or reinforced corners.
If you're creating a variety pack, design a larger box with individual compartments to keep different teas separate.
Remember to test your box design with sample products before finalizing your template to guarantee a perfect fit and easy assembly.
Decorative Finishing Touches
Elegance in tea packaging extends beyond the label to the box itself. To create a cohesive and professional look, consider designing matching tea boxes to complement your personalized labels.
Start by selecting a box template that fits your tea quantity and style preferences. You'll find various free printable box templates online that you can customize to match your label design.
Use the same color scheme, fonts, and graphic elements from your labels to decorate the box. This consistency will create a unified appearance and reinforce your brand identity. Add your logo, tea name, and any relevant information to the box's exterior.
Don't forget to include brewing instructions and ingredient lists if required. For an extra touch of sophistication, consider adding embellishments like ribbon, twine, or wax seals to your tea boxes.
These finishing touches can elevate the overall presentation and make your tea gifts more memorable. If you're feeling creative, experiment with different textures and materials for the box itself, such as kraft paper or glossy cardstock, to enhance the visual appeal and tactile experience of your tea packaging.
Gifting Ideas for Custom Teas

Custom teas with personalized labels make for thoughtful and unique gifts in a wide variety of occasions. You can create these special presents for birthdays, weddings, holidays, or as thank-you tokens. Consider tailoring the tea blend and label design to match the recipient's tastes and the event's theme.
For an extra special touch, pair your custom-labeled tea with complementary items. You might include:
- A beautiful teacup or mug
- A tea infuser or strainer
- A small jar of honey or flavored sugar
- A package of homemade biscuits or cookies
When packaging your gift, use clear cellophane bags or small decorative boxes to showcase the personalized tea labels. Tie them with coordinating ribbons or twine for a polished look.
You can also create a themed gift basket by adding candles, books, or spa items alongside your custom tea.
Don't forget to include brewing instructions with your gift, especially if you've created a unique blend. This thoughtful detail guarantees your recipient can enjoy their tea to its fullest potential.
Storing and Preserving Labeled Teas
For your personalized tea labels to maintain their quality and appeal, proper storage is essential. Keep your labeled teas in airtight containers to protect them from moisture, light, and air exposure. Glass jars with tight-fitting lids or metal tins work well for this purpose. Confirm the containers are clean and dry before transferring your teas.
Store your labeled teas in a cool, dark place away from direct sunlight and heat sources. Avoid keeping them near strong odors, as teas can absorb surrounding scents. A pantry or cupboard is ideal for storage.
If you've used paper labels, consider applying a clear, food-safe sealant to protect them from moisture and wear.
To preserve the flavor and aroma of your teas, don't mix different varieties in the same container. This prevents cross-contamination of flavors. Label each container with the tea type and date of packaging to track freshness. Most teas remain at their best quality for 6-12 months when stored properly.
For long-term storage, you can use vacuum-sealed bags to remove excess air and extend shelf life. Remember to handle your labeled teas with clean, dry hands to prevent introducing moisture or contaminants.
Troubleshooting Common Label Issues

Over time, you may encounter some common issues with your personalized tea labels. Don't worry; most problems have simple solutions. If your labels are peeling off, verify you're using the right adhesive for your container material and tea storage conditions.
For fading text, opt for waterproof and fade-resistant inks, especially if your tea containers are exposed to light or moisture.
When troubleshooting label issues, consider these common problems and their fixes:
- Smudging: Allow ample drying time before handling, or use a fixative spray to protect the ink.
- Wrinkles: Apply labels carefully, smoothing out air bubbles as you go. For stubborn wrinkles, try using a hair dryer to gently heat and flatten the label.
- Incorrect sizing: Double-check your printer settings and template measurements before printing. Test on regular paper first to avoid wasting label sheets.
- Poor print quality: Clean your printer heads, use high-quality paper, and adjust your printer settings for the best results.
If you're still experiencing issues, consider professional printing services for more durable, high-quality labels.
Frequently Asked Questions
Can I Use These Labels for Commercial Tea Packaging?
You shouldn't use free printable labels for commercial tea packaging. It's likely against the terms of use and could lead to legal issues. Instead, consider creating custom labels or hiring a designer for your commercial products.
Are the Templates Compatible With Specific Label-Making Software?
You'll find these templates are versatile and compatible with many label-making software programs. They're typically available in common formats like PDF or JPG, which you can easily import and customize in most design applications.
How Long Do the Printed Labels Typically Last Before Fading?
You'll find that printed labels typically last 6-12 months before fading, depending on the ink and paper quality you use. To extend their life, you can apply a clear protective spray or laminate them after printing.
Can I Create Labels for Loose Leaf Tea Containers?
Yes, you can create labels for loose leaf tea containers. You'll find it's a great way to organize your teas. Simply design custom labels with the tea's name, type, and brewing instructions. It'll make your tea storage look neat and professional.
Are There Any Food Safety Considerations When Using Homemade Labels?
Yes, there are food safety considerations for homemade labels. You'll want to use food-safe ink and adhesives. Don't let the label touch the tea directly. Make certain your labels are clean and won't contaminate the contents.
In Summary
You've now got all the tools to create stunning custom tea labels. With free templates and your personal touch, you'll transform ordinary teas into unique gifts or personalized blends. Don't forget to pair your labels with matching boxes for a polished look. Remember to store your teas properly to preserve their flavor and your beautiful labels. If you encounter any issues, refer back to the troubleshooting section. Now, go ahead and start designing your perfect tea labels!

Leave a Reply