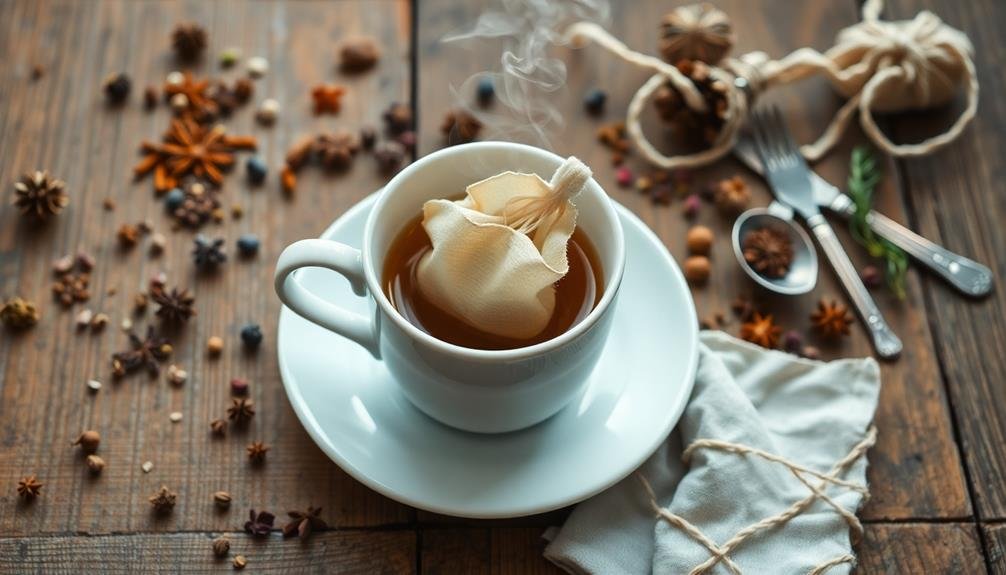
Crafting your own tea bags allows you to create unique blends, control quality, and enjoy a personalized tea experience. You'll need basic materials like unbleached muslin or food-grade filter paper, along with tools for filling and sealing. Choose fresh, high-quality teas and experiment with complementary flavors. Measure 1-2 teaspoons per bag, seal securely, and store in airtight containers away from light and moisture. For perfect steeping, mind your water temperature and steeping times. Homemade tea bags also make thoughtful gifts when packaged creatively. By mastering these techniques, you'll reveal a world of aromatic possibilities and elevate your daily tea ritual.
Benefits of Homemade Tea Bags

With homemade tea bags, you're in control of what goes into your cup. You can select the finest quality ingredients, ensuring a superior taste and aroma compared to store-bought options.
By crafting your own blends, you'll explore unique flavor combinations tailored to your preferences, creating a truly personalized tea experience.
Homemade tea bags offer cost-effectiveness, especially when purchasing herbs and teas in bulk. You'll save money in the long run while enjoying higher quality brews.
They're also environmentally friendly, as you can use biodegradable materials and reduce packaging waste associated with commercial tea bags.
Making your own tea bags allows you to avoid artificial additives, preservatives, and pesticides often found in mass-produced teas. You'll have peace of mind knowing exactly what's in your cup, which is particularly beneficial for those with allergies or sensitivities.
Crafting tea bags can be a fun, creative hobby that lets you experiment with different herbs, spices, and flavors.
It's an excellent way to expand your knowledge of tea and herbal remedies. You can even create custom blends as thoughtful, personalized gifts for friends and family.
Essential Tools and Materials
To make your own tea bags, you'll need a few key materials and tools.
Start with tea bag materials like unbleached filter paper or muslin cloth, along with a selection of loose leaf teas.
You'll also want to gather filling and sealing tools such as a small funnel, scissors, and a stapler or heat sealer to secure your homemade tea bags.
Tea Bag Materials
Creating your own tea bags starts with gathering the right materials. You'll need to choose the fabric for your tea bags carefully. Opt for natural, unbleached materials that won't alter the taste of your tea. Muslin, cotton cheesecloth, or food-grade filter paper are excellent choices. These materials are porous enough to allow flavors to infuse while keeping tea leaves contained.
Consider the size of your tea bags when selecting materials. You'll want enough space for the tea leaves to expand as they steep. Don't forget to account for the seams and drawstring area when cutting your fabric.
For a more eco-friendly option, you can use biodegradable materials like hemp or organic cotton. These choices aren't only better for the environment but also provide a unique texture to your homemade tea bags.
Here's a quick list of essential tea bag materials:
- Unbleached muslin or cotton cheesecloth
- Food-grade filter paper
- Organic cotton or hemp fabric
- Food-safe string for drawstrings or tags
Filling and Sealing Tools
Several essential tools and materials are needed for filling and sealing your homemade tea bags. You'll want a small funnel to easily pour your loose tea into the bags without spillage. A teaspoon or small scoop is useful for measuring out the right amount of tea for each bag. Scissors are necessary for cutting your chosen material to size and trimming any excess after sealing.
For sealing, you have a few options. An iron set to a low heat setting works well for heat-sealing disposable tea bags. If you're using fabric bags, you'll need a sewing machine or needle and thread for stitching them closed. A stapler can be a quick solution for paper tea bags, but make sure you use food-safe staples.
To create a professional finish, consider investing in a heat sealer designed for tea bags. This tool provides a clean, secure seal every time.
Don't forget about labels – you can use a permanent marker to write directly on the bags or create custom tags with string for a polished look. Finally, keep a clean workspace and have a small brush handy to sweep up any stray tea leaves.
Selecting Quality Tea Ingredients
When it comes to crafting your own tea bags, selecting high-quality ingredients is essential. Your homemade tea will only be as good as the components you choose, so it's important to source the best tea leaves, herbs, and spices available.
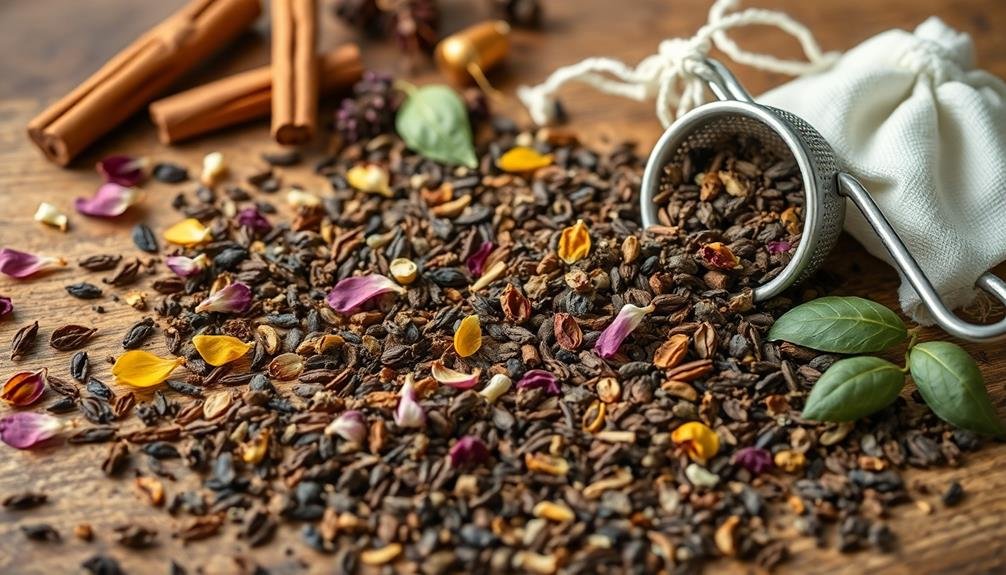
Start by researching reputable tea suppliers who offer a wide variety of loose-leaf teas. Look for organic options and those that are sustainably sourced. Consider the flavor profile you're aiming for and select ingredients that complement each other. Don't be afraid to experiment with unique blends, mixing different types of teas or adding dried fruits and flowers for extra depth.
When selecting your tea ingredients, keep these key points in mind:
- Freshness: Choose recently harvested teas for best flavor
- Origin: Opt for teas from renowned growing regions
- Processing: Select teas that have been properly processed and stored
- Aroma: Trust your nose – fresh tea should have a pleasant, distinct scent
Blending Techniques for Custom Flavors
With your quality ingredients in hand, it's time to explore the art of blending for custom tea flavors. Start by considering complementary tastes and aromas. Pair bold flavors with milder ones to create balance. For example, combine strong black tea with delicate lavender or pair earthy green tea with zesty lemon peel.
Experiment with ratios to find your perfect blend. Begin with a 70:30 ratio of base tea to additional ingredients, then adjust to suit your preferences. Use a small digital scale for precise measurements. Mix ingredients in a clean, dry bowl, gently stirring to distribute evenly without crushing delicate leaves or flowers.
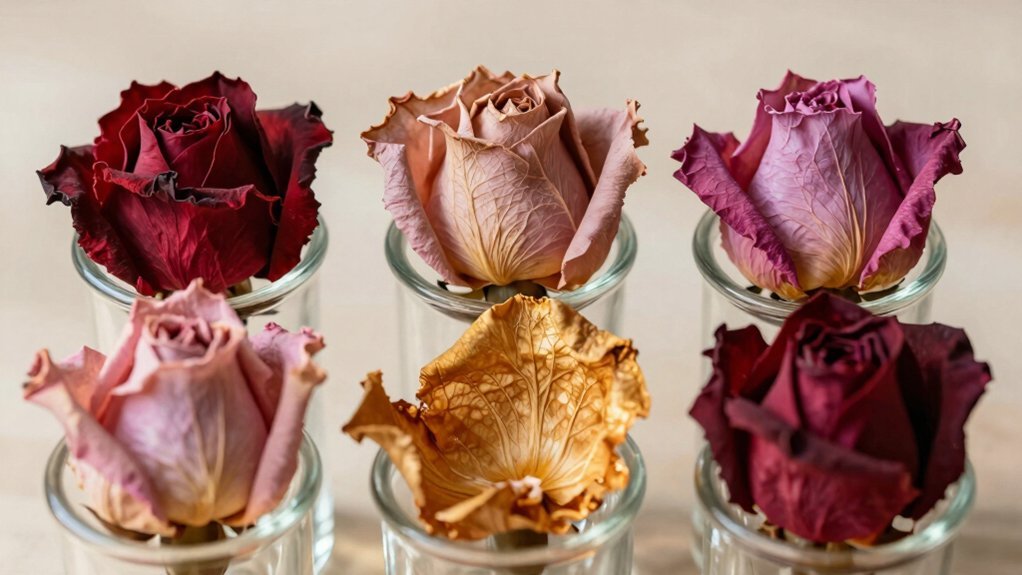
Don't forget about texture when blending. Combine different leaf sizes and shapes for a more complex mouthfeel. Add visual appeal by incorporating colorful elements like rose petals or cornflower blossoms. For herbal blends, consider including roots, berries, or bark for depth and complexity.
Keep notes on your blending experiments to refine your recipes over time. Remember that some flavors may become more pronounced after steeping, so always test your blends before finalizing them.
Choosing the Right Bag Material

Now that you've mastered the art of blending, it's time to contemplate what'll hold your custom tea creation. Choosing the right bag material is vital for preserving flavor, allowing proper steeping, and guaranteeing a pleasant drinking experience.
Consider factors like heat resistance, porosity, and environmental impact when selecting your tea bag material.
Cotton muslin is a popular choice for its natural, breathable properties and ability to withstand high temperatures. It's reusable and allows for excellent flavor infusion.
Paper filters, while disposable, offer convenience and are widely available. They're ideal for single-use bags but may impart a slight papery taste.
Silk sachets provide a luxurious option, allowing for a full flavor release while looking elegant. For an eco-friendly alternative, consider using biodegradable corn fiber bags.
When selecting your tea bag material, keep these key points in mind:
- Porosity: Guarantee proper water flow for maximum flavor extraction
- Heat resistance: Choose materials that won't break down in hot water
- Taste neutrality: Avoid materials that might alter your tea's flavor
- Sustainability: Consider reusable or biodegradable options to minimize environmental impact
Experiment with different materials to find the perfect match for your custom tea blend.
Measuring and Filling Tea Bags
When making your own tea bags, it's essential to understand proper tea portion sizes.
You'll want to measure out the right amount of loose tea for each bag, typically 1-2 teaspoons for a single serving.
Once you've filled your bags with the correct amount of tea, make sure you seal them securely to prevent any leaves from escaping during brewing.
Proper Tea Portion Sizes
For ideal flavor and strength, measuring the right amount of tea for each bag is essential. The perfect portion depends on the type of tea and personal preference, but there are general guidelines you can follow. Typically, you'll want to use about 1 to 2 teaspoons of loose leaf tea per cup (8 ounces) of water.
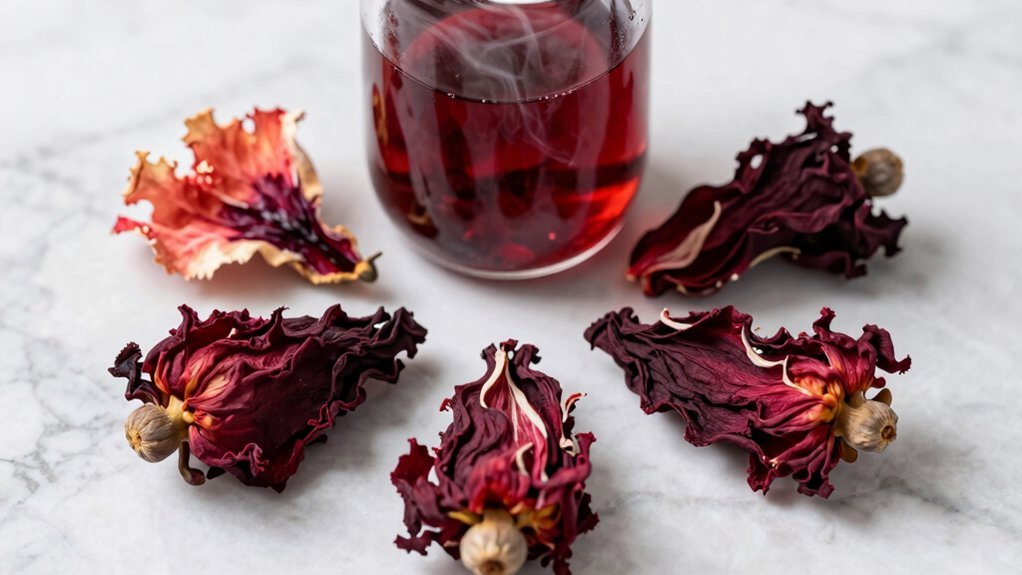
For black teas, aim for 2 grams per cup, while green and white teas require slightly less at 1.5 grams. Herbal teas and tisanes often need more, around 2.5 to 3 grams per cup. Remember, these are starting points, and you can adjust based on your taste preferences.
When filling your homemade tea bags, consider these factors:
- Tea leaf size: Larger leaves require more space to expand
- Steeping time: Longer steeps may need less tea
- Water temperature: Hotter water extracts flavor faster
- Desired strength: Increase or decrease amount for stronger or milder tea
Don't overfill your tea bags, as the leaves need room to expand and release their full flavor. A good rule of thumb is to fill the bag about halfway, allowing ample space for the leaves to unfurl during steeping.
Sealing Homemade Tea Bags
After carefully measuring and portioning your tea, it's time to seal your homemade tea bags. Start by folding the top edge of your tea bag material down about 1/4 inch to create a clean edge. Then, fold it over again to create a double-folded hem. This will prevent fraying and guarantee a secure seal.
For a simple closure, use a stapler to fasten the open end of the bag. Place one staple in the center, or two staples evenly spaced for larger bags.
If you prefer a metal-free option, try using a food-safe adhesive or heat-sealing method. For adhesive, apply a thin line along the folded edge and press firmly. For heat-sealing, use a clean iron on low heat, pressing gently along the edge for a few seconds.
To add a string for easy removal, cut a 6-inch piece of cotton string. Fold it in half and staple or glue it to the top of the bag before sealing.
For a professional touch, attach a small paper tag to the other end of the string, labeling it with the tea type or blend name.
Sealing Methods for Tea Bags

How do you guarantee your homemade tea bags stay intact during steeping? The key lies in choosing the right sealing method. There are several effective techniques you can use to ensure your tea bags remain securely closed, allowing you to enjoy a perfect brew every time.
One popular method is heat sealing. You'll need a small iron or a specialized tea bag sealer for this approach. Simply fold the top of the bag and press it with the heated tool to create a tight seal.
Another option is to use food-safe adhesive, which you can apply along the edges of the bag before pressing them together.
For a more traditional look, you might opt for stapling. Use food-grade staples to secure the top of the bag, making sure they're tightly closed. Alternatively, you can try the drawstring method, which involves threading a string through the top of the bag and pulling it tight.
Here's a quick overview of sealing methods:
- Heat sealing with an iron or specialized tool
- Food-safe adhesive application
- Stapling with food-grade staples
- Drawstring closure with food-safe string
Choose the method that best suits your needs and equipment. With proper sealing, you'll create durable tea bags that'll withstand steeping and deliver a flavorful cup every time.
Proper Storage of Homemade Blends
To keep your homemade tea blends fresh and flavorful, you'll need to store them properly.
Use airtight containers to protect your teas from moisture and air exposure, which can degrade their quality.
Additionally, you should control the temperature and humidity where you store your teas, keeping them in a cool, dry place away from direct sunlight and strong odors.
Airtight Containers for Freshness
Proper storage is essential for maintaining the quality and freshness of your homemade tea blends. Airtight containers are your best friends when it comes to preserving the flavors and aromas of your carefully crafted teas. Choose containers made of glass, ceramic, or food-grade stainless steel to guarantee your blends remain untainted by external odors or chemicals.
When selecting airtight containers for your tea storage, consider the following factors:
- Size: Opt for containers that match the quantity of your blend to minimize air exposure.
- Light protection: Dark or opaque containers shield your teas from harmful UV rays.
- Seal quality: Look for containers with tight-fitting lids or clasps to prevent air infiltration.
- Moisture resistance: Confirm the container material doesn't absorb moisture from the air.
Remember to store your containers in a cool, dry place away from direct sunlight and strong odors. Label each container with the blend name and date of creation to keep track of freshness.
Temperature and Humidity Control
The delicate nature of tea leaves demands careful attention to temperature and humidity when storing your homemade blends. Aim to keep your tea in a cool, dry place with a consistent temperature between 60-70°F (15-21°C). Avoid areas prone to temperature fluctuations, such as near windows, stoves, or heating vents, as these can degrade the tea's quality.
Humidity is equally vital. Ideally, maintain a relative humidity level below 55% to prevent moisture absorption, which can lead to mold growth and flavor deterioration. If you live in a humid climate, consider using silica gel packets or small dehumidifiers in your tea storage area.
Be mindful of strong odors in your storage space, as tea leaves can easily absorb surrounding scents. Keep your blends away from spices, coffee, or other aromatic items.
For long-term storage, you might want to invest in a dedicated tea cabinet or use vacuum-sealed containers to further protect your homemade blends from environmental factors.
Steeping Tips for Perfect Results

How can you guarantee your homemade tea bags deliver the perfect cup? Mastering the art of steeping is essential for extracting the best flavors and aromas from your carefully crafted tea bags.
Start by using freshly boiled water at the appropriate temperature for your tea type. Green and white teas require cooler water (160-180°F), while black and herbal teas thrive in hotter water (190-212°F).
Time your steep carefully; over-steeping can lead to bitterness. Generally, green and white teas need 1-3 minutes, black teas 3-5 minutes, and herbal teas 5-7 minutes. Don't be afraid to experiment to find your ideal brew time. Remember to cover your cup while steeping to retain heat and essential oils.
For the best results, follow these key steeping tips:
- Use one tea bag per 8 ounces of water
- Avoid squeezing the tea bag after steeping
- Stir gently before removing the bag
- Allow black teas to cool slightly before drinking
Creative Gift Ideas
Once you've mastered the art of making your own tea bags, why not share your creations with others? Homemade tea bags make thoughtful and unique gifts for various occasions. You can create personalized tea blends tailored to your loved ones' preferences or health needs.
Consider packaging your tea bags in decorative tins, glass jars, or handmade pouches. Add custom labels with the blend name, ingredients, and steeping instructions. For an extra special touch, include a small teaspoon or infuser alongside your tea bags.
Here are some creative gift ideas for different recipients:
| Recipient | Tea Blend | Packaging |
|---|---|---|
| New Mom | Caffeine-free Chamomile Lavender | Calming blue tin |
| Stressed Friend | Anxiety-relieving Lemon Balm & Passionflower | Zen-inspired wooden box |
| Fitness Enthusiast | Energy-boosting Green Tea & Ginseng | Sporty aluminum canister |
| Cold-prone Colleague | Immune-boosting Echinacea & Elderberry | Glass jar with cork lid |
You can also create themed gift sets for holidays, birthdays, or wedding favors. Don't forget to include a handwritten note explaining the thought behind your custom blends, making your gift even more meaningful and personal.
Frequently Asked Questions
How Long Do Homemade Tea Bags Stay Fresh?
Your homemade tea bags can stay fresh for up to 6-12 months if stored properly. Keep them in an airtight container away from light, heat, and moisture. You'll get the best flavor if you use them within the first few months.
Can I Reuse Homemade Tea Bags Multiple Times?
You can reuse homemade tea bags, but it's not recommended. The flavor weakens considerably after the first use. If you do reuse them, limit it to once more. For the best taste, use fresh tea bags each time.
Are There Any Safety Concerns When Making DIY Tea Bags?
When making DIY tea bags, you should be cautious about using safe, food-grade materials. Avoid synthetic fabrics or chemicals that could leach into your tea. Always clean your tools and workspace thoroughly to prevent contamination. Don't use staples or glue.
How Do Homemade Tea Bags Compare to Store-Bought Ones in Terms of Cost?
You'll typically save money with homemade tea bags. They're cheaper per cup than store-bought ones, especially when you buy loose tea in bulk. Plus, you can control the quality and quantity of ingredients, potentially reducing waste.
Can I Use Homemade Tea Bags for Cold Brewing Methods?
Yes, you can use homemade tea bags for cold brewing. They're perfect for this method! Simply place your custom tea bag in cold water and let it steep in the refrigerator overnight. You'll wake up to a revitalizing, flavorful brew.
In Summary
You've now mastered the art of crafting your own tea bags. With your newfound knowledge, you're ready to experiment with unique blends and create the perfect cup every time. Don't forget to share your creations with friends and family – they'll love your personalized tea gifts. Remember, the key to a great cup lies in quality ingredients, proper storage, and careful steeping. So go ahead, release your creativity, and enjoy your homemade tea adventures!

Leave a Reply