
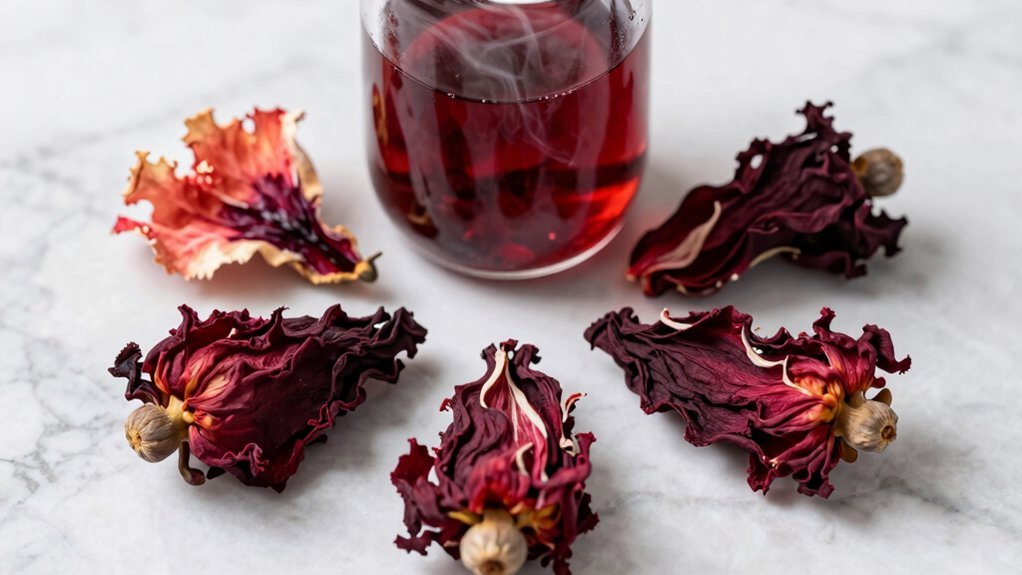
The best ways to dry herbs include air drying, oven drying, microwave drying, using a food dehydrator, sun drying, silica gel drying, and freeze drying. Air drying is the simplest method, while oven and microwave drying offer quicker results. A food dehydrator provides consistent drying for larger quantities. Sun drying works well in warm climates, and silica gel helps preserve shape and color. Freeze drying retains the most flavor and nutritional value but requires specialized equipment. Each method has its advantages, and you'll want to choose based on your climate, quantity of herbs, and desired results. Exploring these techniques can help you find the perfect method for your herb-drying needs.
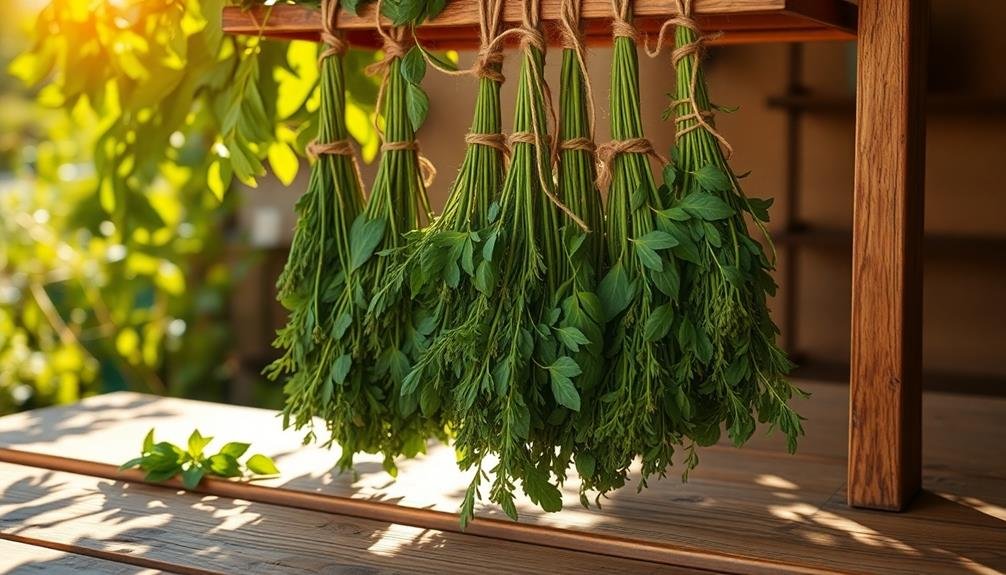
Air Drying Herbs

While air drying is one of the oldest and simplest methods for preserving herbs, it's still incredibly effective. To air dry herbs, start by harvesting them in the morning after the dew has evaporated but before the sun becomes too strong. Choose healthy, unblemished stems and leaves for the best results.
Gently rinse the herbs and pat them dry with a clean towel. Remove any damaged or discolored leaves. Gather small bunches of herbs and tie them together at the stem ends with twine or a rubber band. Hang these bundles upside down in a warm, dry, and well-ventilated area away from direct sunlight. A spare room, attic, or covered porch can work well.
You'll want to check your herbs regularly for signs of mold or discoloration. Depending on the herb and environmental conditions, the drying process can take anywhere from a few days to a couple of weeks.
Your herbs are ready when they're crisp and crumble easily. Once dried, store them in airtight containers in a cool, dark place to preserve their flavor and potency.
Oven Drying Method
Oven drying is another effective method for preserving herbs, especially when you're short on time or dealing with humid conditions.
To begin, preheat your oven to its lowest setting, ideally between 150°F and 170°F. Wash and pat dry your herbs, then spread them in a single layer on a baking sheet lined with parchment paper.
Place the baking sheet in the oven, leaving the door slightly ajar to allow moisture to escape. Check your herbs every 30 minutes, rotating the baking sheet for even drying. Most herbs will take 2-4 hours to dry completely, depending on their moisture content and size.
You'll know your herbs are ready when they're crisp and crumble easily between your fingers. Be careful not to over-dry them, as this can lead to a loss of flavor and essential oils.
Once dried, remove the herbs from the oven and let them cool completely before storing.
Oven drying is faster than air drying but requires more attention. It's ideal for larger batches of herbs or when you need to dry them quickly.
However, be mindful that this method can be less energy-efficient and may slightly alter the herbs' flavor compared to air drying.
Microwave Drying Technique
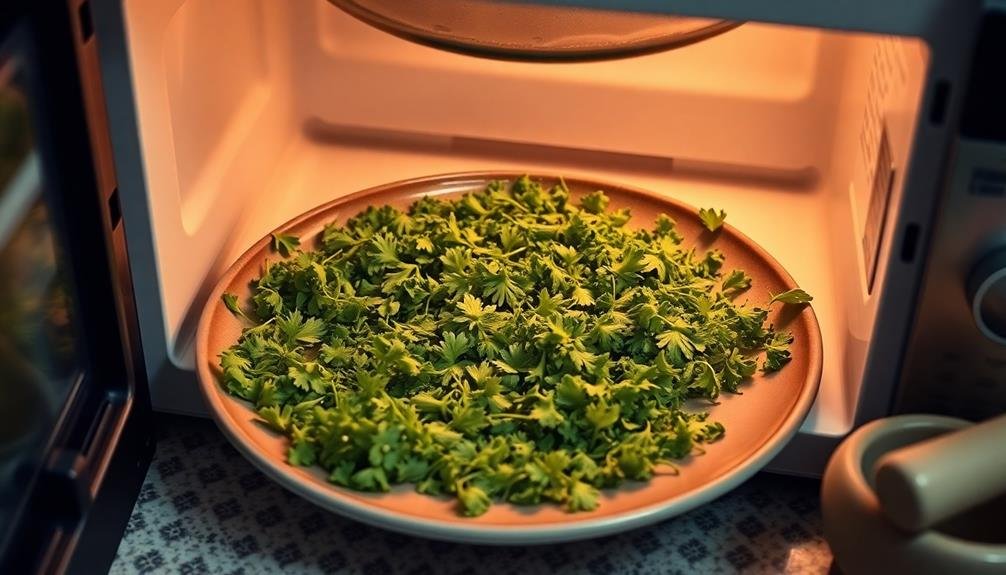
Speed demons of the herb drying world, microwave drying offers a quick and efficient method for preserving your herbs. It's perfect for small batches and can be completed in just a few minutes.
To use this technique, start by washing and patting your herbs dry. Then, place a single layer of herbs between two paper towels on a microwave-safe plate.
Set your microwave to its lowest power setting and heat the herbs in 30-second intervals, checking them after each round. Be careful not to overheat, as this can cause the herbs to burn or lose their essential oils. Most herbs will dry completely within 2-3 minutes.
Here's a quick guide to microwave drying times for common herbs:
- Parsley and cilantro: 1-2 minutes
- Basil and mint: 1-3 minutes
- Oregano and thyme: 1-2 minutes
- Rosemary and sage: 2-3 minutes
Once your herbs are crisp and crumbly, remove them from the microwave and let them cool completely.
Store them in airtight containers away from light and heat. While microwave drying is fast, it's best suited for small quantities and may not preserve flavor as well as other methods.
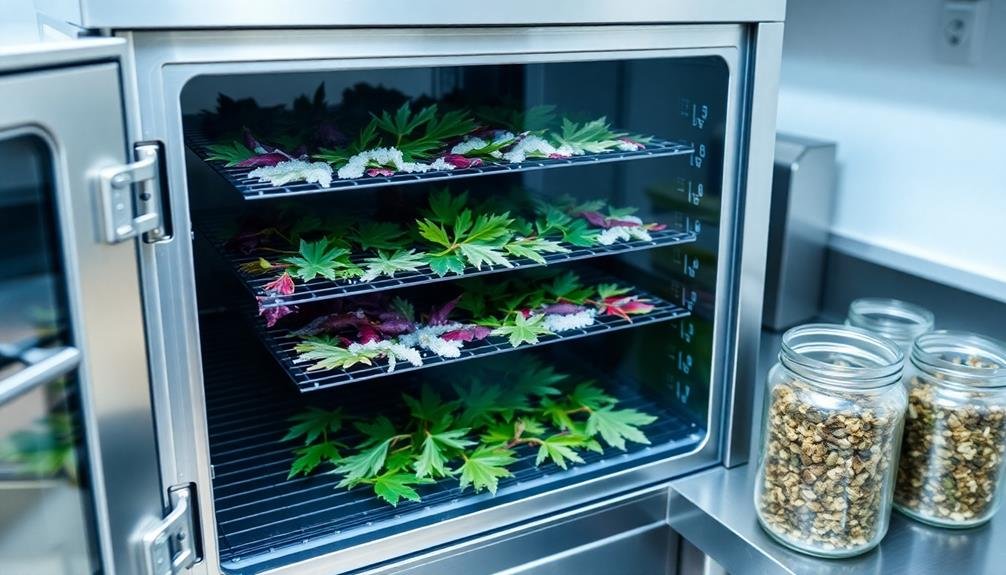
Food Dehydrator Approach
For those looking to dry larger quantities of herbs with consistent results, a food dehydrator is an excellent option. This method offers precise temperature control and even airflow, ensuring your herbs dry thoroughly without losing their essential oils and flavors.
To use a food dehydrator, start by washing and patting your herbs dry. Remove any damaged leaves and arrange the herbs in a single layer on the dehydrator trays. Make sure there's space between the herbs for air to circulate.
Set your dehydrator to a low temperature, ideally between 95°F and 115°F, to preserve the herbs' delicate properties. The drying time will vary depending on the herb type and moisture content, but it typically takes 2 to 4 hours.
Check your herbs periodically; they're ready when they're crisp and crumble easily. Once dried, store them in airtight containers away from light and heat.
A food dehydrator is particularly useful for herbs with high moisture content, like basil and mint. It's also great for processing large batches at once, making it ideal for gardeners or those who buy herbs in bulk.
Sun Drying Process
To sun dry your herbs, you'll need to choose a warm, sunny spot with good air circulation.
Before placing your herbs outside, wash them gently and pat them dry, then spread them in a single layer on a clean, flat surface.
You'll want to check on your herbs daily, turning them occasionally and bringing them inside at night to protect them from moisture.
Selecting Suitable Outdoor Location
When choosing an outdoor location for sun drying herbs, you'll want to find a spot that receives plenty of direct sunlight throughout the day. This guarantees your herbs dry quickly and evenly, preventing mold growth and preserving their flavor and aroma.
Look for an area that's protected from wind, which can blow away your herbs or contaminate them with dust and debris.
Consider these factors when selecting your outdoor drying location:
- Sunlight exposure: Aim for at least 6-8 hours of direct sunlight daily
- Wind protection: Choose a spot sheltered from strong breezes
- Cleanliness: Avoid areas with heavy pollution or dust
- Accessibility: Select a location that's easy to monitor and maintain
You'll also want to make sure your chosen spot is free from pests and animals that might disturb or eat your herbs.
If you're drying herbs on a balcony or patio, make sure it's elevated and away from curious pets.
Remember to bring your herbs indoors at night to protect them from dew and potential rainfall, which can slow down the drying process and potentially lead to mold growth.
Proper Herb Preparation Steps
Before sun drying your herbs, proper preparation is essential to guarantee the best results. Start by harvesting your herbs in the morning after the dew has evaporated but before the sun becomes too intense. Choose healthy, unblemished leaves and stems for the best flavor and longevity.
Gently rinse your herbs in cool water to remove any dirt or insects. Shake off excess moisture and pat them dry with a clean towel. Remove any damaged or discolored leaves, as these can affect the overall quality of your dried herbs.
For herbs with smaller leaves, like thyme or oregano, you can dry them on their stems. For larger-leaved herbs such as basil or mint, strip the leaves from the stems.
Lay the herbs in a single layer on a drying screen or cheesecloth-covered tray, ensuring they don't overlap.
If you're drying seed heads, tie them in small bundles and place them in paper bags with holes punched for ventilation. This will catch any seeds that may fall during the drying process.
Remember to label your herbs clearly to avoid confusion later on.
Monitoring Drying Progress
Consistent monitoring is essential during the sun-drying process to guarantee your herbs dry evenly and maintain their quality. Check your herbs regularly, ideally every few hours, to verify they're drying properly and not exposed to any potential contamination.
You'll need to be vigilant about weather changes, as unexpected rain or high humidity can quickly undo your progress.
As you monitor your herbs, keep an eye out for these key indicators:
- Color changes: Most herbs will gradually fade to a lighter shade of green as they dry.
- Texture: The leaves should become crisp and crumbly when fully dried.
- Aroma: A strong, concentrated scent indicates that the herbs are retaining their essential oils.
- Uniformity: Verify all parts of the herb are drying at the same rate, rotating or repositioning as needed.
If you notice any signs of mold or discoloration, remove the affected herbs immediately to prevent contamination.
Silica Gel Drying
Silica gel drying offers a quick and effective method for preserving herbs.
You'll find that silica gel, a moisture-absorbing substance, draws water out of herb leaves and flowers while maintaining their shape and color.
To use this technique, you'll need to carefully prepare your herbs and follow a specific process to achieve the best results.
How Silica Gel Works
Desiccation is the key principle behind silica gel's effectiveness in drying herbs. This synthetic, porous form of silicon dioxide acts as a powerful desiccant, absorbing moisture from its surroundings. When you use silica gel to dry herbs, it rapidly draws out water from the plant material, preserving its shape, color, and essential oils.
Silica gel works through a process called adsorption, where water molecules adhere to its surface. Here's how it functions:
- Attraction: The gel's porous structure creates a large surface area that attracts water molecules.
- Binding: As water vapor comes into contact with the silica gel, it binds to its surface.
- Retention: The gel can hold up to 40% of its weight in moisture without feeling wet.
- Regeneration: Once saturated, you can reactivate the gel by heating it to release trapped moisture.
You'll find silica gel particularly useful for drying delicate herbs or flowers that might lose their shape with other methods. It's a quick and efficient way to preserve your herbs, typically taking only a few days to complete the drying process.
Remember to use food-grade silica gel when working with culinary herbs.
Preparing Herbs for Drying
Now that you understand how silica gel works, let's focus on preparing your herbs for this drying method.
Start by harvesting your herbs in the morning after the dew has evaporated but before the sun gets too hot. Choose healthy, undamaged leaves and stems for the best results.
Gently rinse the herbs in cool water to remove any dirt or debris, then pat them dry with a clean towel.
Carefully inspect your herbs and remove any discolored or damaged parts. For larger herbs like basil or mint, you'll want to separate the leaves from the stems. Smaller herbs like thyme can be dried whole.
Spread the herbs in a single layer on a tray lined with paper towels and allow them to air dry for about an hour to remove any excess moisture.
Once your herbs are prepared, you're ready to begin the silica gel drying process.
Fill the bottom of an airtight container with a layer of silica gel. Gently place your herbs on top of the gel, ensuring they don't touch each other.
Cover the herbs completely with more silica gel, making sure there are no air pockets.
Silica Gel Drying Process
Mastering the silica gel drying process is key to preserving your herbs effectively. This method works exceptionally well for delicate flowers and herbs that might lose their shape or color through other drying techniques.
To use silica gel, you'll need a container with an airtight lid and food-grade silica gel crystals.
Here's how to dry your herbs using silica gel:
- Pour a 1-inch layer of silica gel into your container.
- Gently place your herbs on top of the gel, ensuring they don't touch each other.
- Carefully pour more silica gel over the herbs until they're completely covered.
- Seal the container and store it in a cool, dry place for 2-7 days.
Check your herbs daily by gently brushing away the gel. They're ready when they feel crisp and papery.
Once dried, remove the herbs carefully and brush off any remaining silica gel with a soft paintbrush. Store your dried herbs in airtight containers away from direct sunlight.
Freeze Drying Herbs
For those seeking the ultimate in herb preservation, freeze drying offers unparalleled results. This method removes moisture from herbs while retaining their original shape, color, and flavor. You'll need a freeze dryer, which is an expensive investment but worth it for serious herb enthusiasts.
To freeze dry herbs, start by washing and patting them dry. Arrange the herbs in a single layer on the freeze dryer trays, ensuring they don't overlap. Place the trays in the freeze dryer and follow the manufacturer's instructions for the drying cycle, which typically takes 24-48 hours.
The process works by freezing the herbs and then creating a vacuum environment. This causes the frozen water in the herbs to sublimate, turning directly from ice to vapor without passing through the liquid stage. The result is herbs that are completely dry yet maintain their original structure and nutritional value.
Once the cycle is complete, store your freeze-dried herbs in airtight containers away from light and heat. They'll stay fresh for years, retaining their potency and flavor far longer than herbs dried by other methods.
When you're ready to use them, simply rehydrate by adding water or use them as-is in your recipes.
Frequently Asked Questions
Can I Dry Different Herbs Together, or Should They Be Separated?
You should dry herbs separately to maintain their individual flavors and aromas. Mixing them can lead to cross-contamination and muddled tastes. Keep each herb type in its own drying space for the best results and quality.
How Long Do Dried Herbs Typically Last When Stored Properly?
You'll find properly stored dried herbs can last 1-3 years. They're best when used within a year for ideal flavor. Store them in airtight containers away from light and heat to maximize their shelf life.
What's the Best Way to Store Dried Herbs After Processing?
Store your dried herbs in airtight containers like glass jars or sealed bags. Keep them in a cool, dark place away from sunlight and moisture. You'll want to label each container with the herb's name and drying date.
Are There Any Herbs That Shouldn't Be Dried at All?
You shouldn't dry herbs with high water content like basil, chives, or cilantro. They'll lose flavor and texture. Instead, freeze these delicate herbs. Most other herbs dry well, but always research specific varieties before drying them.
How Do I Know When My Herbs Are Sufficiently Dried?
You'll know your herbs are sufficiently dried when they're crisp and crumbly to the touch. They should easily break apart when rubbed between your fingers. The leaves will feel papery and make a slight rustling sound when moved.
In Summary
You've now learned several effective methods to dry herbs, from traditional air drying to more advanced techniques like freeze drying. Each method has its pros and cons, so choose the one that best suits your needs and equipment. Remember, properly dried herbs can last for months, preserving their flavor and medicinal properties. Whether you're drying herbs for culinary use or herbal remedies, you'll now be able to enjoy your homegrown or foraged herbs year-round.

Leave a Reply